
We’ve partnered with WAVY-TV 10 to showcase real backyard makeovers around Hampton Roads. In each segment, we tackle unique challenges, create functional spaces, and help families reconnect with the outdoors. This blog captures the highlights—before and after photos, pricing, project details, and the “why” behind each transformation. So if you’re dreaming of your own backyard upgrade, this might help spark a few ideas.

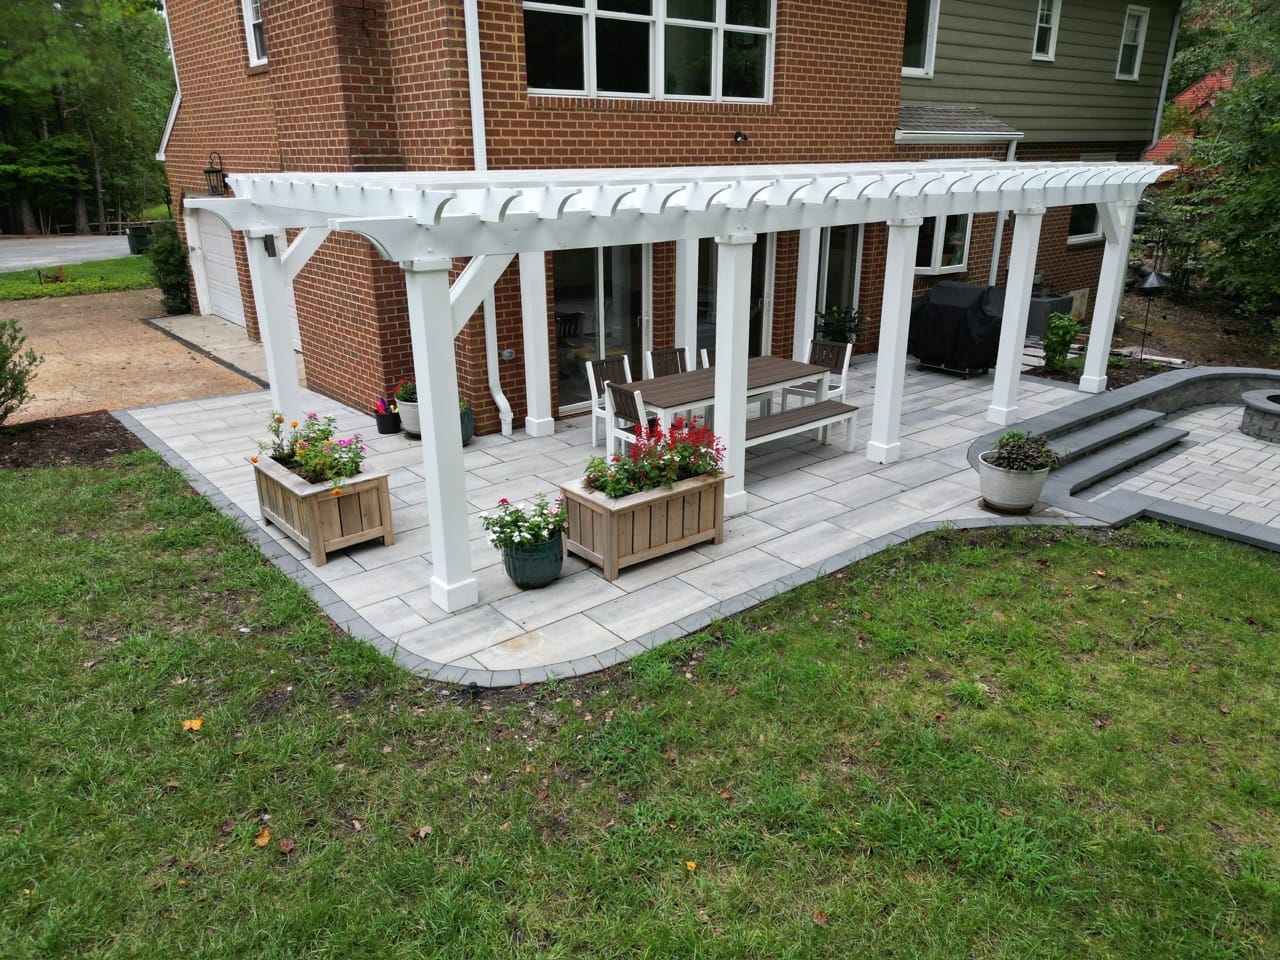
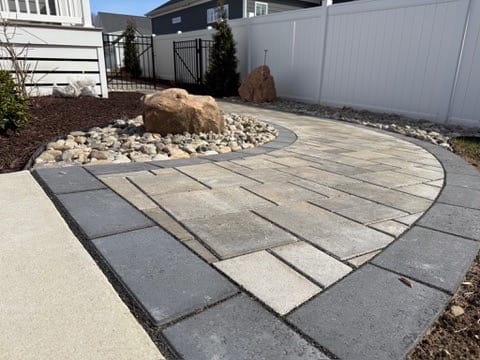
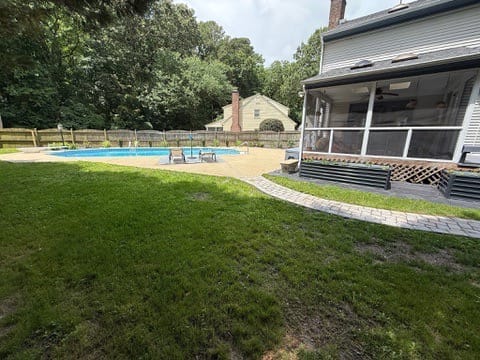
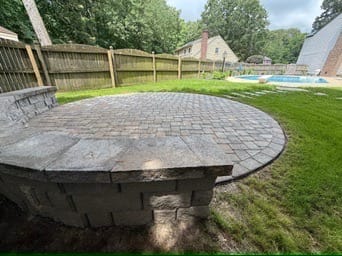
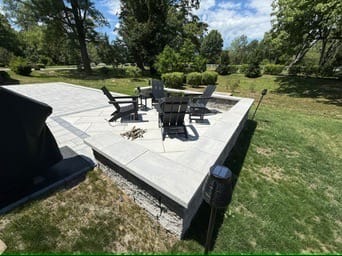
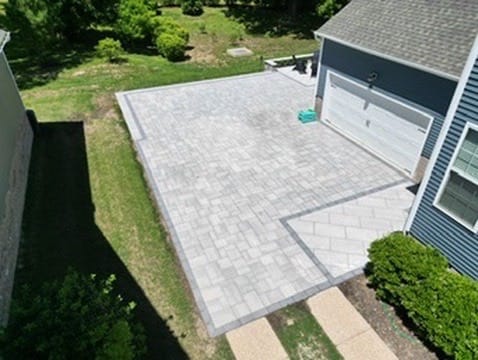
A small concrete landing, slippery wood steps, and unused space made this yard uninspiring to enjoy or entertain in.

Now, the space features a spacious curved patio, a cozy recessed fire pit, and safe, attractive access from the back door.
The homeowners wanted to spend more time outside with friends. This project gave them a fire pit to gather around with friends, a spot for their grill and table, and safer, more functional access to the yard.


Cost: $104,000 (everything included except the pre-existing hot tub)
Timeline: 7 weeks
Watch the segment on The Hampton Roads Show: Transforming Your Yard

This side yard had been going mostly unused, especially since backyard restrictions (RPA setbacks) limited what could be done out back. But side yards can be full of potential.

This new outdoor living space includes two pavilions, a complete outdoor kitchen, a putting green, and over 1,300 sq ft of beautiful pavers.
The homeowners wanted a gathering space for their family—and a way to use the hot tub without worrying about rain. Since they couldn’t make great use of their backyard, the side yard became the perfect solution.

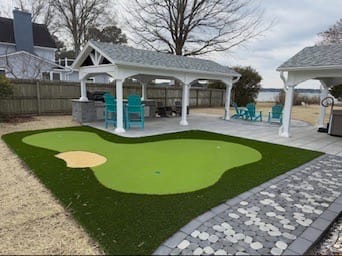


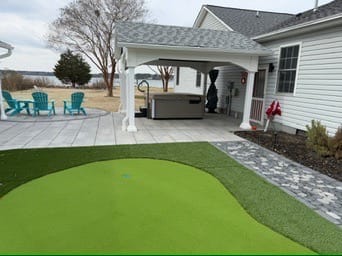


Cost: $25,380
Timeline: 2.5 weeks
Watch the segment on The Hampton Roads Show: Side Yard Renovation Inspiration

A muddy side yard with no real use or flow to the backyard.

Now there’s a well-lit, curved walkway with boulders and natural design that welcomes grandkids and guests alike.
The homeowners wanted their grandkids to be able to run from the car straight to the backyard — no mud, no mess, just a fun, safe path.


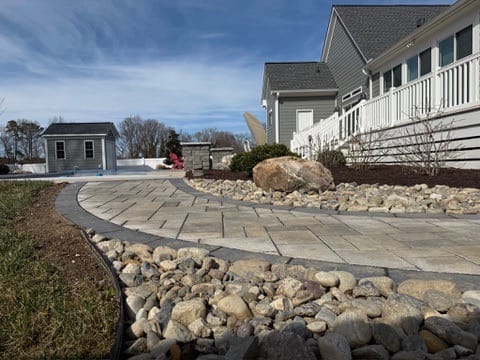
Cost: $38,300
Timeline: 3 weeks
Watch the segment on The Hampton Roads Show: Backyard Transformation Inspiration

A mostly empty yard with a worn-out concrete slab and no real reason to go outside.

Elevated pavers and a backyard pond bring a sense of peace and purpose to the space.
This family realized they wanted to spend more time outside—but their backyard wasn’t helping. Being near the water, flooding was a concern, so we elevated the whole space and built with that in mind. We removed the old concrete slab, installed new pavers, and even added a pond inspired by the display setup at our Poquoson shop. The result? A peaceful space with the calming sound of running water.


Cost: $23,800
Timeline: 4 days
Watch the segment on The Hampton Roads Show: Backyard Transformation Inspiration

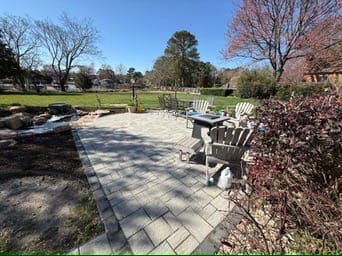
An awkward patch of grass between a sidewalk and house was hard to maintain and offered little value.

The family already had a pool and were adding a pool house—this fire pit zone was the missing piece. We installed 620 square feet of modular pavers, a 30-foot seating wall, a Breeo fire pit with a cooking insert, lighting, and a transformer to power it all.
With a pool already in place and a pool house going up, the fire pit completed the outdoor oasis — creating a space to unwind or entertain.


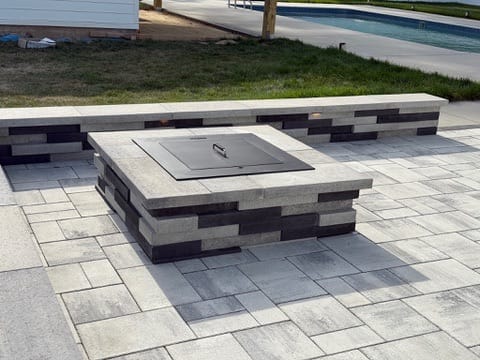


Cost: $16,420
Timeline: 3 working days
Watch the segment on The Hampton Roads Show: Revamping Your Outdoor Space

This new homeowner had just taken out a bunch of trees, and what remained was muddy, uneven, and not very inviting.

With a paver walkway, seating wall, composted lawn, and a cozy fire pit area — it’s now functional and fun.
The homeowners had just purchased the property and were ready to make it their own — starting with the backyard. Their goal was to personalize the yard, solve drainage issues, and create a usable area. Good prep work (like stump removal and drainage) laid the foundation for a beautiful, long-lasting space.


A mismatched paver driveway didn’t fit the lifestyle the homeowner envisioned, and a lot of underutilized space.

A clean, functional patio with a cozy fire pit and space for basketball and extra parking.
This homeowner had a paver driveway made from three different pavers added at different times—it was functional, but felt disjointed. He wanted something smoother, more cohesive, and multi-functional: a space for basketball, car parking, and hanging out.


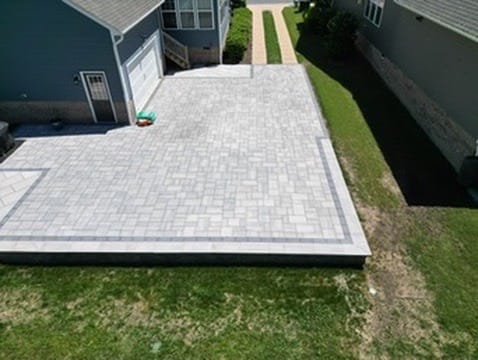


Cost: $30,450
Timeline: 3 weeks
Watch the segment on The Hampton Roads Show: Outdoor Space Revamp Inspiration

A tiny townhome yard with a concrete slab and no privacy left the homeowner feeling exposed.

A raised patio with a roofed structure and fan creates a private outdoor living room — even with tall neighbors!
This townhome had a small backyard that felt even smaller due to its lack of privacy. With neighbors looking down from a taller house behind, the homeowner wanted a space that felt private, shaded, and relaxing.
We built a retaining wall to level the patio with her back door, added a roofed shade structure with a fan, and installed stone curbing, landscaping, and lighting to make it feel like a true outdoor room.


Cost: coming soon
Timeline: Planned for 8 weeks → completed in 16 weeks
Watch the segment on The Hampton Roads Show: Outdoor Space Revamp Inspiration

A blank slate at a brand-new home.

A tropical paradise complete with a pool, cascading waterfall, lush landscaping, and a boulder fire pit that brings the resort feel home.
Our clients had just finished building their retirement home and wanted to make their backyard a true getaway — right from the start. Instead of waiting years to add a pool or patio, they went all-in on their dream space: a tropical retreat where they could relax, entertain, and feel like they were on vacation every day.
This project proves that outdoor spaces can be so much more than concrete and open decks. By adding layers of landscaping, creating cozy “rooms,” and weaving in water and fire features, we built a backyard that feels like a resort — without ever leaving home.


Cost: $28,000 (higher-end fire pit space — customizable based on your budget and features)
Timeline: 4 days
Watch the segment on The Hampton Roads Show: Designing Your Dream Backyard
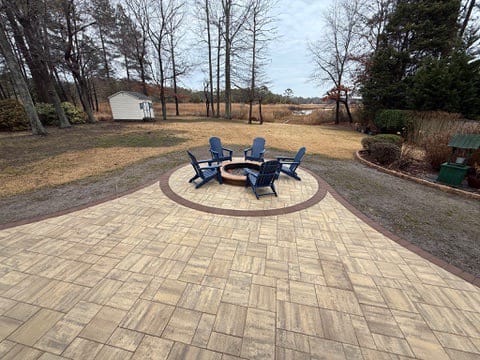
A yard with an amazing waterfront view, but no place to sit and enjoy it.

A cozy, elevated fire pit patio designed for relaxing evenings by the water — complete with boulders, lighting, and the sound of flowing water.
The homeowners wanted to transform an unused corner of their yard into a true destination — a space that felt cozy, elevated, and easy to enjoy without the hassle of woodburning fires. They wanted a place where they could simply turn on the gas fire pit, unwind by the water, and take in the view.
When you’re designing a fire pit area, think beyond the fire. Adding lighting, natural stone, and even the gentle sound of water turns a simple patio into a space that invites you to stay awhile.


Cost: $29,200
Timeline: 4 days
Watch the segment on The Hampton Roads Show: Designing Your Dream Outdoor Space

A simple fire pit with chairs on the grass—nice for an evening fire, but not quite the inviting hangout the homeowner envisioned.

A cozy wood-look patio, ambient lighting, and a perfectly placed pergola turned this breezy bayfront corner into a one-of-a-kind retreat.
The homeowner already loved his fire pit setup but wanted something that matched the rest of his upgraded yard. This design added comfort, durability, and a distinct coastal feel to a space that’s often exposed to wind and weather.
A well-placed pergola can do more than provide shade—it can frame the perfect view and make your outdoor space feel intentional and complete.


Timeline: 3 weeks (limited accessibility through double doors from the school)
Watch the segment on The Hampton Roads Show: Creating an Outdoor Oasis

A courtyard constantly soaked from poor drainage—water ran across concrete and flooded the mulch beds, leaving the area muddy and unusable for students.
Clean curbing, low-profile turf, and river rock turned this courtyard into a functional and inviting space where students can relax between classes.
The school wanted a safer, cleaner space for students that wouldn’t flood every time it rained. This project solved the drainage problems while giving the courtyard a more polished, welcoming look.
Smart drainage and durable materials can completely transform how a space functions—especially in high-traffic or hard-to-reach areas.


Cost: $51,000
Timeline: 7 weeks (start-and-stop coordination with the builder—normally we like to complete these all at once)
Watch the segment on The Hampton Roads Show: Revamping Your Yard for Fall

The patio was completely enclosed by a two-story glass structure with sliding doors—even on the second floor. It wasn’t up to code and left the homeowners worried about safety, especially with young kids around.

The unsafe enclosure is gone, replaced with a spacious paver patio, cozy fire pit, and a pergola that keeps the space shaded but open. It’s now a perfect spot for fall nights with family.
The homeowners wanted to transform an outdated, unsafe structure into a functional and family-friendly outdoor space—something they could enjoy comfortably all year long.
Replacing old or unsafe features with an open design can completely change how your yard feels—safer, more comfortable, and ready for any season (especially fire pit weather!).


If any of these projects sparked an idea for your own yard, we’d love to help make it happen. Big or small, there’s always a way to transform your space into something you’ll love.